

A homeowner off Highway 331 called us two weeks after the tropical system passed through last September asking a specific question: her water damage had been dried, the demolition was complete, and the restoration company that handled mitigation had told her they’d see her in a few weeks for reconstruction. She wanted to know what “reconstruction” actually involved and why there was a gap between mitigation and rebuild in the first place. Her questions were the ones most Freeport property owners have at that specific stage of post-storm recovery. Reconstruction after storm damage follows a specific sequence that moves the property from stripped-and-dried condition back to pre-storm functionality, and understanding the sequence helps property owners know what to expect during what’s typically the longest phase of the whole recovery.
Why Reconstruction Comes After Mitigation Rather Than With It
Before walking through the reconstruction steps themselves, understanding why the two phases are typically sequential rather than simultaneous helps make the whole process clearer.
The specific reasons mitigation and reconstruction are separate:
- Moisture verification must confirm materials have reached safe dry conditions before rebuild work goes over them
- Scope clarity comes from completed mitigation, which exposes exactly what needs to be rebuilt
- Insurance coordination typically produces an approved scope between the two phases
- Material selection and ordering happens during this gap, since many finish materials have lead times
- Permit coordination for structural work often requires time
- Mold risk management means rebuild shouldn’t happen over surfaces still carrying moisture
- Secondary damage identification continues through the mitigation phase and sometimes extends scope
For Freeport properties specifically, the Florida humidity makes the moisture verification piece particularly important. Rebuilding over materials still carrying moisture produces mold conditions within weeks, requiring tear-out and redo. The gap between mitigation and reconstruction isn’t inefficient scheduling. It’s the window where the project transitions from stopping damage to rebuilding.
For the homeowner off Highway 331, her mitigation had completed on day 8 after the storm. Her reconstruction was scheduled to begin on day 22. The 14-day gap covered final moisture verification, insurance scope approval, material ordering, and permit processing. All of that work was happening even though nothing visible was changing at her property.
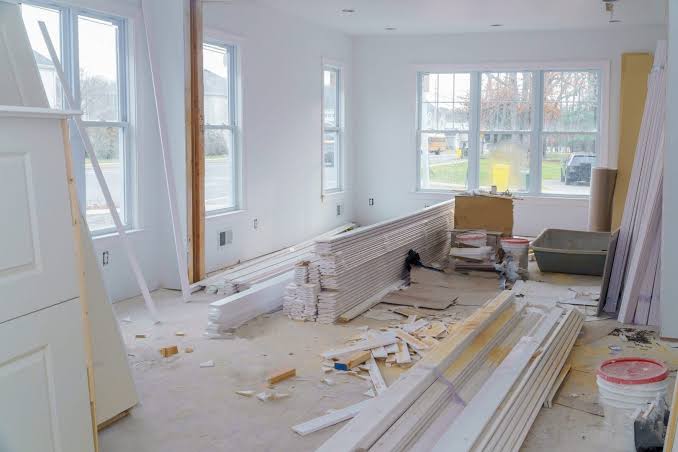
Step 1 and 2: Scope Confirmation and Protection Setup
The reconstruction phase begins with specific preparation that sets up everything that follows.
The specific starting activities:
- Scope walkthrough with the project manager, confirming what will be rebuilt and verifying no additional damage has surfaced during the gap
- Material staging including delivery of drywall, insulation, flooring materials, and other components to on-site or nearby staging areas
- Property protection setup including covering flooring in work areas, protecting furniture that remained in place, and setting up dust containment
- Access coordination confirming entry schedules with occupants or property managers
- Utility verification making sure power, water, and other services are available for the work
- Safety setup including dust protection, ventilation if needed, and work zone delineation
- Documentation refresh with photographs establishing the baseline condition at the start of reconstruction
For storm damage reconstruction projects that involve multiple damage types (water, wind, structural), this setup phase typically runs a day and establishes the organized conditions needed for efficient subsequent work. Rushed setup produces chaotic reconstruction. Thorough setup produces organized execution.
For storm damage reconstruction projects at Freeport properties, this phase also often includes coordination with other trades that may need access, including electricians, plumbers, or HVAC technicians for any system repairs discovered during mitigation.
Step 3 and 4: Structural Work and Framing Repairs
Once setup is complete, structural work begins. This phase addresses any framing, decking, subflooring, or structural components damaged during the storm.
The specific structural activities:
- Framing repairs or replacement for any studs, joists, rafters, or structural members affected
- Subfloor repair or replacement in areas where water or structural damage compromised the subflooring
- Roof deck repair if the storm damaged roof decking that wasn’t fully addressed during mitigation
- Wall sheathing repair for exterior wall sections affected by wind or water intrusion
- Load-bearing component verification confirming structural integrity for any affected members
- Fire blocking and draft stopping installation where required by current building codes
- Rough carpentry for any specialty details like window or door frame repairs
For Freeport homes with coastal exposure, this phase sometimes also involves verification of structural components beyond the visibly damaged areas, since the storm may have stressed components in ways that produce latent damage. Properties within a few miles of the Gulf or Choctawhatchee Bay often have slightly elevated structural inspection needs following significant storm events.
For storm damage reconstruction projects with substantial structural scope, this phase typically runs 2 to 7 days depending on complexity. Simpler reconstruction with mostly cosmetic damage may skip to the next phase quickly.
Step 5 and 6: Systems Work and Rough-In
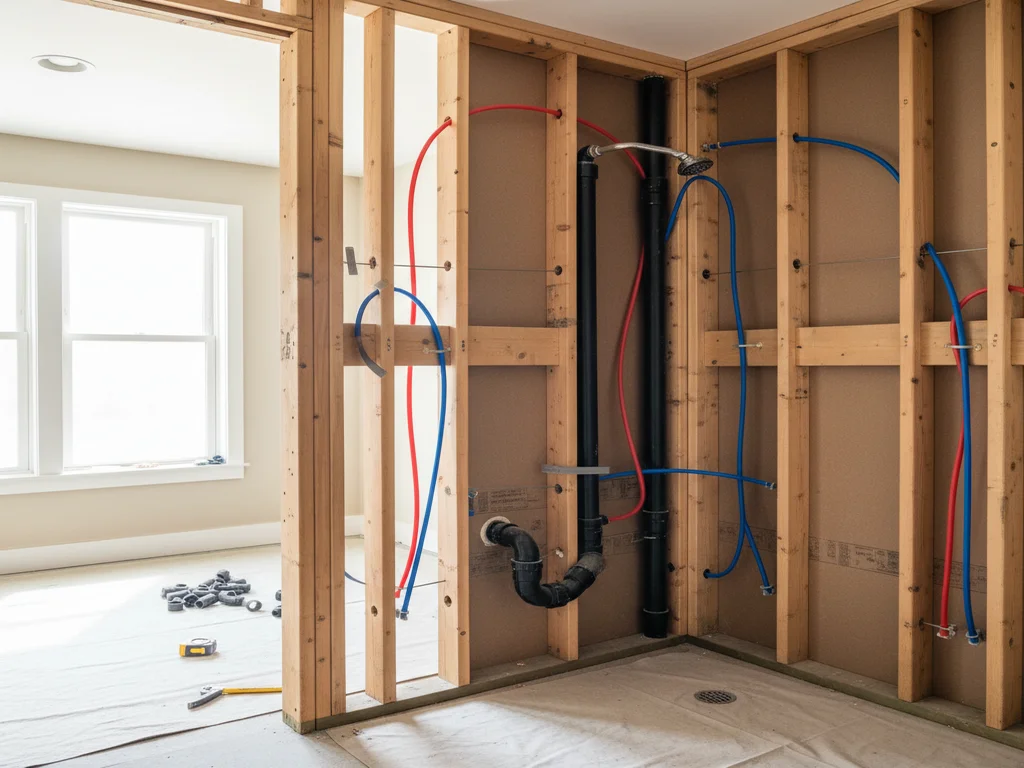
With structural components in place, systems work addresses any electrical, plumbing, or HVAC repairs needed before walls can be closed back up.
The specific systems activities:
- Electrical rough-in including replacing damaged wiring, outlets, switches, or circuit components
- Plumbing rough-in addressing any supply lines, drain lines, or fixtures affected by the damage
- HVAC coordination for any ductwork repairs or system components requiring attention
- Low-voltage work including network cabling, security system wiring, or similar systems
- Insulation installation in walls and ceilings after rough-in inspections
- Vapor barrier installation where appropriate for the specific wall assembly
- Inspections by local authorities for any work requiring permit sign-off
For Freeport reconstruction projects, Walton County permit coordination typically affects this phase timing. Rough-in inspections may require scheduling that extends the overall timeline by a few days.
For properties where multiple trades are coordinating during this phase, the schedule management becomes critical. Companies that coordinate electrical, plumbing, HVAC, and insulation work internally or through established subcontractor relationships produce cleaner project continuity than those that manage trades through ad-hoc scheduling.
For the Highway 331 project, the systems rough-in phase ran 4 days and included electrical work in two walls, HVAC ductwork repair in the attic, and insulation installation in all affected cavities. Working with a restoration company that handled this coordination directly produced smoother flow than the alternative of managing separate contractors.
Step 7, 8, and 9: Drywall, Finish Work, and Flooring
With structural and systems work complete, the visible rebuild begins. This phase is what most property owners picture when they think about reconstruction, and it’s typically the longest phase of the project.
The specific finish activities:
- Drywall installation including hanging, taping, mudding, and sanding to produce finish-ready surfaces
- Primer and paint application including ceilings, walls, and trim
- Trim and millwork installation including baseboards, door casings, window casings, and crown molding
- Door installation for any interior doors that were removed or damaged
- Window installation if windows were affected and replaced
- Cabinetry installation for kitchens, bathrooms, or other spaces with built-in storage
- Flooring installation including hardwood, tile, carpet, luxury vinyl plank, or whatever materials match the pre-damage condition
- Fixture installation including lighting, plumbing fixtures, hardware, and appliance reinstallation
- Final paint touch-ups addressing any damage during installation of other components
For Freeport reconstruction projects, this phase typically runs 1 to 3 weeks depending on scope and material lead times. Specialty materials with longer lead times (custom tile, specific hardwood species, unique fixtures) can extend this phase significantly.
For property owners planning around reconstruction completion, understanding this phase’s realistic timeline helps set expectations. Homeowners who try to rush this phase typically produce quality compromises that surface after the project appears complete.
Step 10: Final Verification and Project Closeout
The last phase of reconstruction completes the project with final verification and handoff documentation.
The specific closeout activities:
- Final walkthrough with the project manager and homeowner identifying any items needing attention
- Punch list completion addressing any items identified during the walkthrough
- Final cleaning including construction debris removal, dust cleanup, and surface cleaning
- Final inspections by local authorities for any work requiring final permit sign-off
- Documentation delivery including warranty paperwork, permit records, and photographs of completed work
- System verification confirming all electrical, plumbing, and HVAC systems operate correctly
- Content return coordination for any items that had been placed in storage during the work
- Insurance claim closeout documentation for the carrier’s final records
- Warranty orientation explaining what warranties cover and how to access them
For Freeport property owners, the documentation package produced during closeout serves ongoing property care, future insurance considerations, and property sale disclosures across the years. Working with a reconstruction company that produces thorough documentation protects property owners well beyond the immediate project completion.
What the Whole Sequence Actually Produces
Reconstruction after storm damage follows a specific sequence from scope confirmation through final closeout, typically running 4 to 12 weeks depending on project scope and material lead times. Freeport property owners who understand what should happen at each stage can evaluate whether their specific reconstruction is being handled well or poorly, recognize what questions to ask when something seems off, and set realistic expectations for both timeline and disruption. The Highway 331 project reached final closeout about 7 weeks after reconstruction began, with the homeowner returning to a property that fully reflected its pre-storm condition. That outcome is the goal of properly executed reconstruction, and understanding the step-by-step sequence is what helps property owners recognize whether their specific project is tracking toward it.
Get Storm Damage Reconstruction Handled Correctly at Your Freeport Property
The team at Truvorne Roofing & Restoration is ready to help. Contact us today to schedule professional reconstruction after storm damage at your Freeport, FL property with the certified crews, trade coordination, and step-by-step process execution that produces properties genuinely restored to pre-storm condition.